Go to theme: Loose
Table of content
1.Theme Installation
1.1. Installation via the WordPress admin panel
After downloading the loose.zip file to your computer, please go to Appearance > Themes > Add New < Upload Theme in your WordPress admin panel and upload the loose.zip file from your computer. You can activate the theme by clicking the Activate button.

A list of recommended plugins will appear at the top of the screen, click Begin installing plugins.

Select all by clicking on the square at the top, and then select Install from the drop-down list and Apply.

To activate plugins click ‘Return to Required Plugins Installer’

Select all then click ‘Activate‘ and ‘Apply’

Now your theme is ready to go.
2. Image size settings
Before you upload images you must set the appropriate dimensions for all photos. It is very important. Otherwise, your thumbnails will be blurry and pixelized. To do this, go to Settings > Media in the WordPress panel and define settings for WordPress media uploads.
Best Image Size for Loose Theme in pixels:
Thumbnail size: Width 150 – Height 150
Medium size: Max Width 464 – Max Height 9999
Large size: Max Width 732 – Max Height 9999

Some additional info: https://codex.wordpress.org/
To apply those changes to already uploaded images you can use Regenerate Thumbnails plugin. To install this plugin please go to > Plugins > Add New in the Search area write the name of the plugin you are looking for. In this case “Regenerate Thumbnails” and click enter 🙂

Please click the ‘Install Now‘ button and after a few seconds ‘Activate Plugin’

Now your plugin is already installed and activate.
Next please go to > Tools > Regen.Thumbnails

and Click ‘Regenerate All Thumbnails’ button

This can take a while 🙂 and all DONE:)
Good JOB:)
3. Homepage slider
Home Page Slider displays Sticky Post with a Featured Image.
GOOD TO KNOW
To view homepage slider you must have ready-made posts. If you do not know how to write a new blog post in WordPress read this article.

To set up Home Page Slider first:
3.1. Set up Featured Image
Featured Image represent the contents, mood or theme of a post. Featured Image is used in a number of areas like on the homepage, post page, popular post areas, homepage slider, etc.

Open the editor of the post (please go to > Posts > All Posts) then Open the post in which you want to display a unique custom header image (featured image).

Locate the Featured Image module on the right. Click Set Featured Image. Now You can upload your image or choose one from your Media Library.


Be sure to update your post when you’re finished.
3.2. Display Sticky Posts
REMEMBER
The slider displays only posts marked as ‘Sticky’ in WordPress.
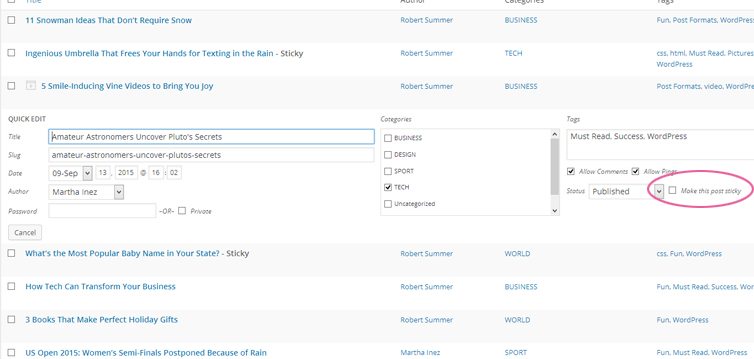
- You can make a sticky post from the Quick Edit option under the post.
Please go to WordPress Dashboard > Posts > All Posts. Find post, go to Quick Edit and Make this post sticky by checking the tick box > Update

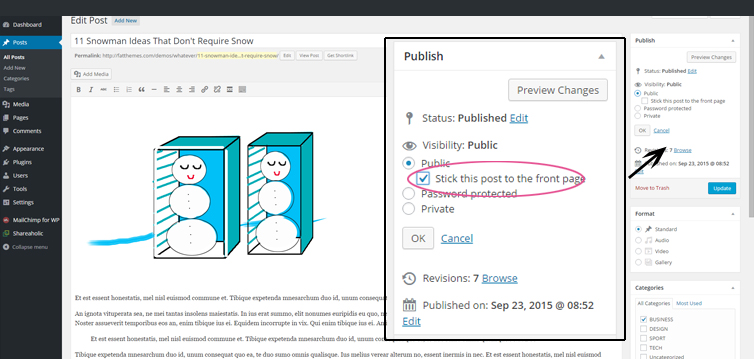
- or you can also open up the post’s page go to Visibility (the ‘Publish’ section in the Post editor) click Edit and check Stick this post to the front page, click OK and Publish.
GOOD TO KNOW
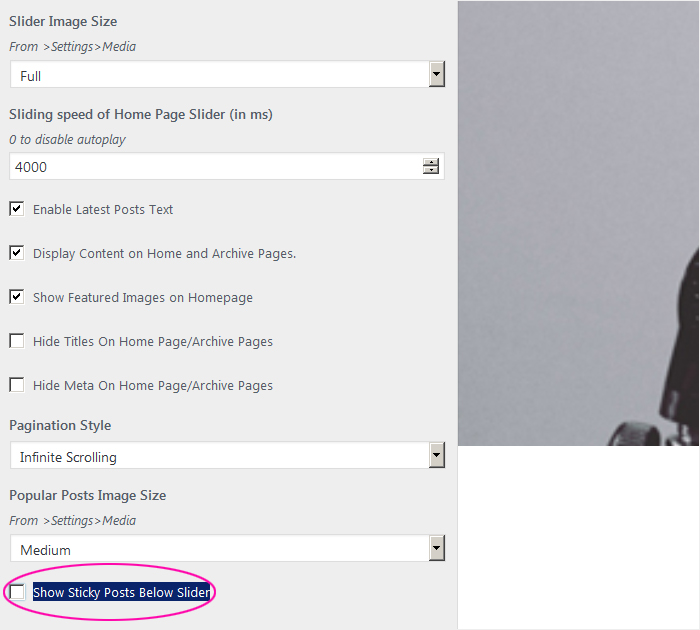
Posts displayed in the slider automatically disappear from the list of posts on the page (they move to the slider). To display posts in two places (in the slider and on the page with posts) enter Appearance> Customize> Home Page and select Show Sticky Posts Below Slider.
3.3. Slider settings
Loose theme gives you the ability to customize the slider. By entering Appearance> Customize> Home Page you can change:
- Height of Home Page Slider,
- Slider Image Size,
- Numer of Visible Images in Slider.
4. Post formats

Loose has the possibility to create 8 different post formats: standard, audio, video, gallery, link, image, quote and aside.
Standard Post
A standard post is the default post format.
You can add text and images to your post.
Audio Post
An audio post allows you to share a music or audio track and display it at the top of the post.
Video Post
A video post displays a video at the top of your post.
Gallery Post
A gallery post allows you to create a slideshow-type gallery at the top of your post.
Link Post
A link to another site.
Image Post
A single image.
Quote Post
A quotation.
Aside Post
Typically styled without a title. Similar to a Facebook note update.
GOOD TO KNOW
If you do not know how to write a new blog post in WordPress read this article.
5. Picture of the author (user)

The Author’s image is taken from service gravatar.com.

You need the same email address set up in Gravatar service as in WordPress admin panel (Users >Your Profile)
6. Widgets Areas
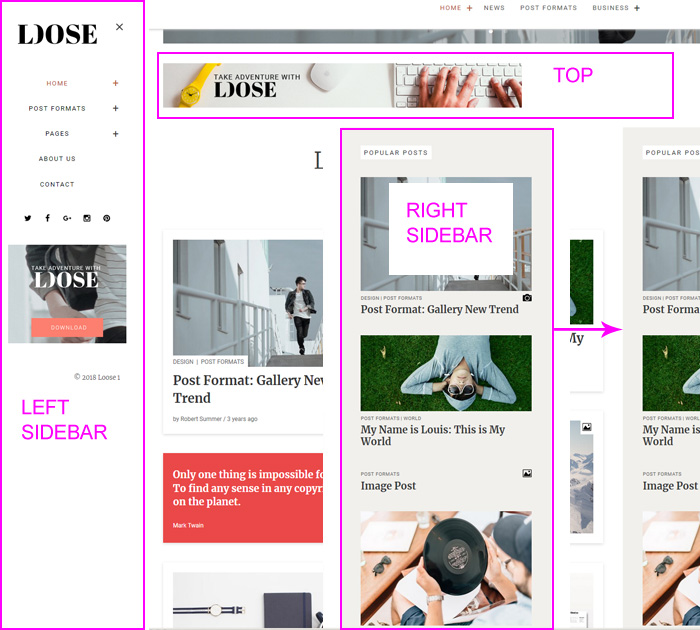
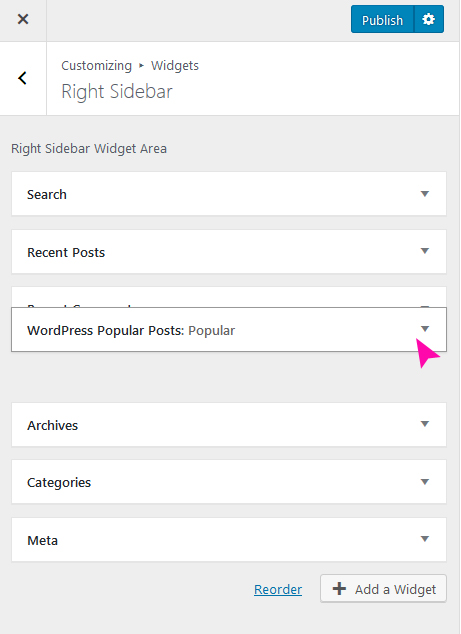
Loose has 3 different widgets areas: Right Sidebar, Left Sidebar, and Top. You can add additional content to your website in 3 different, specially prepared areas.
To configure individual widgets areas please enter Appearance > Customize > Widgets (or Appearance > Widgets).
If you want to change the place of displaying a given plugin within the same area, right-click on it, hold and move it.
In turn, if you want to move a given plugin to another widget area, go to Appearance > Widgets and drag it to the place you want.
For more information on widgets, see the article: How to Display Widgets in WordPress blog.
6.1. Setting up the Sidebar

Loose WordPress Theme has one right sidebar contain widgets that you can customize. Loose WordPress Theme has one right sidebar containing widgets that you can customize. To enable/disable the sidebar on your homepage, your posts, and/or your archive pages (category pages, author page, etc.) go to Appearance > Customize > Home Page and choose your perfect layout.

Loose Recommended Plugins in Right Sidebar Widget Area:
6.1.1. WordPress Popular Posts

is a highly customizable widget that displays the most popular posts on your blog. More info: https://wordpress.org/
note: plugin output is filtered by „Loose” theme and not all options works
6.1.2. Instagram Slider Widget

is a responsive slider widget that shows 24 latest images from a public Instagram user.
More info: https://wordpress.org/
6.1.3. MailChimp for WordPress Lite

adding sign-up methods for your MailChimp lists to your WordPress site should be easy. With this MailChimp for WordPress, it finally is. This plugin helps you add subscribers to your MailChimp lists using various methods. You can create good looking opt-in forms or integrate with any other form on your sites, like your comment form or WooCommerce checkout.
More info: https://wordpress.org/
6.1.4. Text Widget

7. Supported plugins
Loose is ready for use with the following WordPress plugins:
- WordPress Popular Posts to show the most popular posts. Note: plugin output is filtered by the „Loose” theme and not all options works.
If you need original plugin functionality (please go to > Appearance > Customize > Advanced) and check Enable WordPress Popular Posts original markup. - User Social Profiles to show social icons on the author’s site.
- MailChimp for WordPress to show a MailChimp newsletter subscribe
- Jetpack by WordPress.com
- Contact Form 7 to display contact forms.
- Instagram Slider Widget – to show images from a public Instagram user.
- Shareaholic – to share buttons, related posts, social analytics.